Did you know that Shopify, by default, wraps your store’s logo or header text in an
tag? While that might look fine visually, it’s not ideal for SEO. To fix your Shopify < H1 > heading and improve your site’s structure, every page should have one unique and meaningful
— reflecting the main topic of that specific page, not just repeating your brand name.
Step-by-Step Fix: How to Fix Shopify H1 Heading
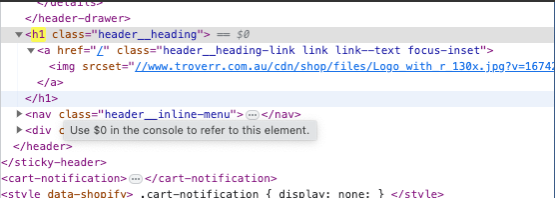
1. Inspect What’s Currently Set as <h1>
- Open your Shopify store in your browser.
- Right-click anywhere and click Inspect or simply press F12.
- Once the HTML panel opens, press Ctrl + F or Command + F (Mac) to search for:
<h1 class=”header_heading”>
…..</H1>
2. Edit the Theme Code
- In your Shopify admin, go to: Online Store → Themes → Edit Code
- Open the header.liquid file
- Search <h1 inside of the code
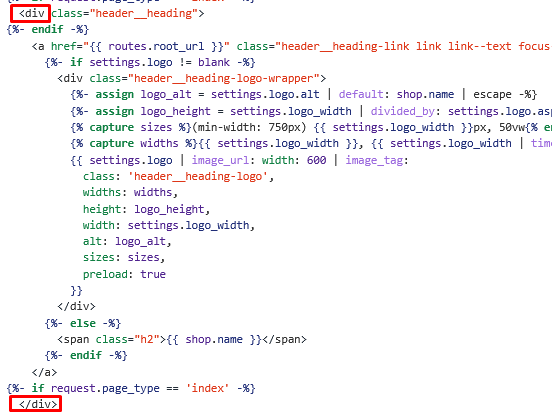
- Replace both the opening and closing <h1> tags with <div> tags.
At the beginning of the code, change
<h1 class=”header__heading”> to <div class=”header__heading”>
At the end of the section, change the closing tag
</h1> to </div>

3. Save and Review Your Changes
Once you’ve replaced both the opening and closing <h1> tags with <div>, click Save in the top-right corner of the code editor.
Then, refresh your store in the browser and inspect the header again to confirm that the <h1> tag has been successfully removed from the logo section.
This final check ensures you’ve successfully fixed your Shopify H1 heading, making your page structure more SEO-friendly and better optimized for search engines.
Need Help Customizing Shopify Heading Tags?
Want to use Shopify sections more effectively for <h1>, <h2>, and <h3> tags?
Looking to restructure your theme’s heading hierarchy for better SEO and accessibility?
Fill out the form below to get in touch — or if you’d like to see a real-world example, check out one of our Shopify store case studies here.